

I have become a card-carrying member of the Use-What-You-Have School of Crafting of late. And here’s what I had to craft with this week:
- A foam wreath base
- A box of Henry FeatherFinish Underlayment Patch and Skimcoat
- An open bag of partially dried-up preserved moss
- A slightly beat-up flocked bird
- Matte finish Mod Podge
- Jute twine
Fortunately, those were the exact materials I needed to make this concrete and moss wreath.

Inspiration
I’ve been thinking about making a concrete wreath ever since I made my DIY concrete pumpkins last fall.

The pumpkins might look like solid concrete, but they actually have a Styrofoam base underneath. I just gave them a skim coat of FeatherFinish, which means that the concrete is only skin deep and the pumpkins are extremely lightweight.
Since the pumpkins turned out, I assumed the FeatherFinish treatment would work on a wreath, too.
Skim coating the wreath
Here’s the wreath I had on hand. The label says it measures 9.8 inches (24 cm) across.

The Henry FeatherFinish I used is sold in small 7-pound boxes. Technically speaking, it’s made for patching and repairing subfloors, but in my experience, it’s great for craft projects, too.
It’s super simple to use. You just mix two parts powder to one part water.

Then you stir it with a paint stick or popsicle stick.

It ends up looking like frosting. You can spread it with a putty knife or a popsicle stick.

If you’re applying it to a rounded surface like a pumpkin or a wreath, I’ve found it works best to just use your hands.

I wore gloves when I spread it on my wreath to make cleanup easier. Then I just threw the gloves out when I was done. (Obviously, this is a cement product that hardens as it dries, so if you have to do any cleanup after working with it, use your garden hose, not your kitchen sink.)

The FeatherFinish hardens quickly, in 15 minutes or less. Unless you have an old box and you didn’t reseal the plastic bag the powder is in after the last time you used it. Grrrr. As with most things in life, I learned this lesson the hard way.
I ended up having to let my wreath dry overnight. The next morning I sanded down the rough edges and my wreath was ready to be adorned.
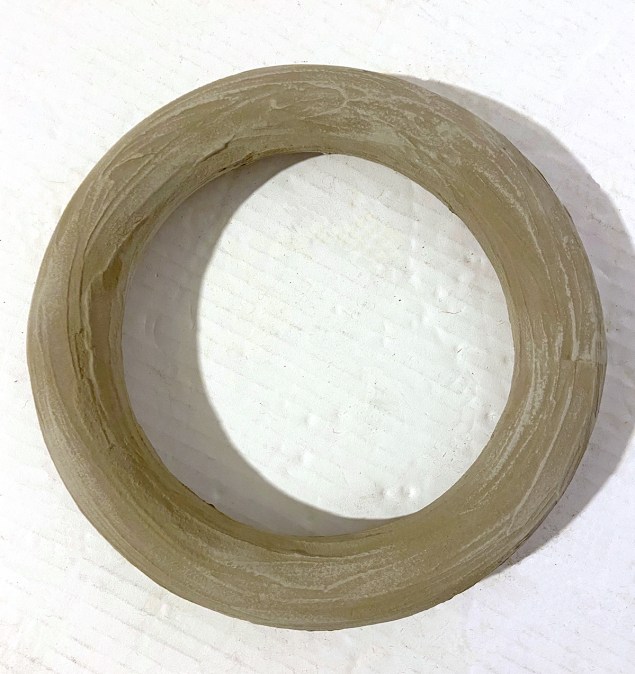
Adding the moss
I knew I had bought some moss a year or two ago for an ill-fated project that I abandoned midway through. Sadly, when I dug the bag of moss out of storage, I discovered that it had dried out and much of it had turned a drab olive color.

I soldiered on with the dried-out moss anyway.

I pulled the moss apart into clumps and then applied them somewhat randomly to the wreath, adhering them with Mod Podge.

I actually started to like the variation in the moss color as I worked with it.

I wanted some of the concrete to show, to give the appearance that the moss was growing on it, so I didn’t cover the whole wreath.

Once I had all the moss placed where I wanted it, I wound jute twine around the entire wreath.

The twine helps hold the moss in place.

FeatherFinishing a feathered friend
At this point, I felt like the wreath needed a little something extra to zhuzh it up, but what exactly that meant, I wasn’t sure. I played around with adding artificial flowers and greenery, but nothing looked quite right.
Then I saw the 99-cent bag o’ birds that I had used in another recent project and a lightbulb went off in my brain: Why not give the FeatherFinish treatment to one of the beat-up little birds I had left?
Here’s the one I chose to use.

Before I started applying the FeatherFinish to him, I plucked his eyes out, with plans to replace them afterward.

Then I mixed up a small batch of skimcoat and started globbing it on my little bird.

He had more nooks and crannies than the wreath, so it took me a little more time to get him all covered and get the cement mixture smoothed out.

Here’s what he looked like after the cement had dried and I had sanded his rough edges down.

And here’s what he looked like after I gave him eyes.

The eyes are my favorite part. I feel they give him a little personality. Just like with my decoupaged newspaper birds, his eyes were made from a couple of old brads.

Finishing touches
Next, I sprinkled a bit of moss onto my bird. Some of it I adhered with Mod Podge, but some of it I just tucked in underneath his wings.

Before I nestled my little birdie into his new home, I painted his beak black with some watered down acrylic craft paint. I also flicked a bit of the paint onto the wreath too, to make the concrete look a little old and weathered.

And there you have it: a concrete and moss wreath.
Honestly, the bird is its saving grace. I was feeling pretty blah about the whole project until the end. Once I added the bird, I loved it. 💚🐦 💚
That’s all for this week, folks. I have lots of other ideas in the hopper, and I’m kind of getting back into the swing of blogging again, so hopefully I’ll have another post next week. Until then, stay well and stay safe!
— Lisa
Hi Lisa. Love the wreath and love your description of yourself! Its kinda me as well! Visiting from Funky Junk.
Thank you! It’s always fun to hear how people found their way to my blog. 🙂
I adore your unique wreath! Love the mix of concrete and natural elements. I’ve had a package of those birds in my craft bin for ages and I LOVE the idea of making them look concrete! Maybe now I’ll use them. Thanks for the great idea 🙂
Thanks, Marie! I was surprised myself how good the bird ended up looking. I was afraid the concrete might cover too many of the details that the bird would be unrecognizable, but happily, that was not the case.
Stunning Lisa. I’m not a big fan of wreaths but this one just blew me away. Such a really cool idea
Thank you! 🙂